
U-brake set-up and adjustment
This guide will show you how to adjust a u-brake, front or rear. This is a general procedure. Although there are multiple brake models and each is set-up a little differently, this guide should provide you with enough basic knowledge.
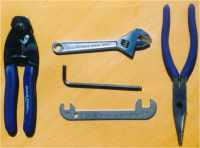
You will need:
- Allen wrench
- 3rd hand tool (optional)
- cone wrench
- adjustable wrench
- needle nose pliers
1. Preparation
Loosen the springs by turning the Allen bolts about 1/2 - 1 turn counterclockwise. Screw all barrel adjusters about 3/4 of the way in. This will allow you to fine tune the adjustment when you are finished.
2. Adjust the brake pads
Slightly loosen the bolts that hold the brake pads. Line up the pads so that they both contact the rim squarely and do not hang over the edge of the rim or rub the tire. When they are lined up, tighten the bolts.
3. Set the cable
Loosen the cable anchor bolt. Squeeze the brake pads against the rims, then pull the cable tight. You may want to use pliers to hold the cable. Then tighten the anchor bolt while still holding the cable.
4. Tension the springs
The cone on your left is tightened by turning it clockwise, the cone on your right is turned counterclockwise.
a. Starting on the left, turn the cone clockwise until the brake pad is about 1 - 1.5 cm from the rim. While holding the cone in place, tighten the Allen bolt to lock in the adjustment.
b. Tighten the cone on your right by turning it counterclockwise. Turn until both brake pads are an equal distance from the rim, then tighten the Allen bolt.
5. Fine tuning
When everything is set, test the brakes. If you need to, screw the barrel adjusters in or out to get the desired feel.
The tools for this repair can be purchased at:
Performance Bike, REI, or eBay.
Truly appreciate your well-written posts. I have certainly picked up valuable insights from your page. Here is mine 46N about Cosmetics. Feel free to visit soon.